The "Lego Star Wars PC"
Introduction
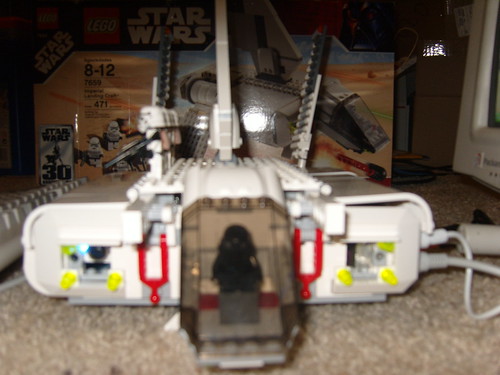
One day I was poking around looking for possibilities for a new Mythtv frontend machine for our bedroom. I was specifically investigating using a Mini-ITX board made by VIA. While poking around for information, I came across a new cheap Mini-ITX board made by Intel - the D201GLY2. After some checking it looked like it would not really be feasible for my plan for a Mythtv Frontend due to the speed probably being under what is required for High Definition and the build in video too week to use for HD even if it had XvMC acceleration available like the VIA does. However, I was also looking to build a 1st computer for my 9 month old son William. I knew I wanted something "kiddie" and unique to do a case mod for, and this board looked like it would be excellent for Windows XP and children's games rarely need much in the manner of graphics capabilities so this looked like a good start. So, I ordered a board, a 1 Gig stick of RAM and a PicoPSU-90 for a power supply. My first idea build a run-of-the-mill Lego PC (there are several out there). So, I headed to the store in search of a "bucket o' Lego". Not finding any (do they still make them?) I came across the Stars Wars Legos, and on the back of one of the boxes they showed the Lego 7659 Imperial Landing Craft . It looked kind of like a flying pizza box and I thought to myself maybe I could cram a motherboard in the hull. (Plus how fitting is it to have an Imperial ship powered by Intel and Windows?). Also, my Star Wars "Geekiness" is somewhat famous having officiated a wedding as a Jedi once . So, with all of those factors in mind I went to another store and picked one up. When I got it home it was clearly too small, but it looked like if it was double the size it would work. So I ordered another set of just the ship (minus the Mini Figures) off of e-bay and started building. My idea was this - I would double the size of the hull and put 2 engines and leave the wings and cockpit the same size, hoping that it wouldn't look too out of proportion.
Tesing the D201GLY2
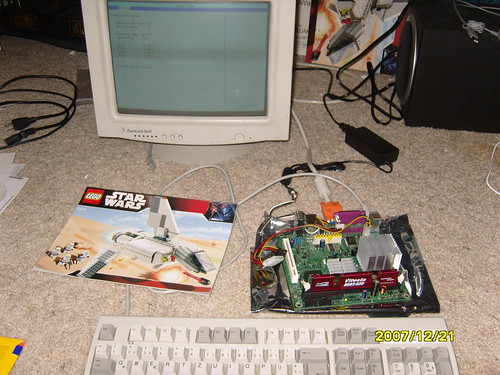
First, I did a "smoke test" with the D201GLY2 and PicoPSU-90. Everything looked good, but the Northbridge heatsink was burning hot to the touch and BIOS reported that the CPU was running a near 70 degrees Celsius. I hadn't planned on using a fan in this system, hoping to run completely passively, but just the extreme temperature the Northbridge had to be getting to made me nervous. I quick search on the internet yielded no one who was brave enough to run the D201GLY2 completely passively (Is Intel just teasing us?). So, I picked up a 40mm fan and decided to try to figure out some way to integrate it in.
Lego Constuction
Putting together two Lego sets was a little harder than I thought. The design hangs over the edge of the 12x12 (Lego bips) the base, so the middle had to be improvised some. Instead of 4 engine turrets, there was only room for three. The two back engines had to be combined. The middle "spine" across the hull had to be duplicated and shifted to the left and right, resulting in a Texas Stadium type "hole" in the roof. There were no acceptable Legos available in the 2 sets to fill the hole, so I ordered some 12x2 pieces from a Lego exchange website. Major portions were Superglued together for stability and to keep my son from choking on small legos.
Installing the Motherboard
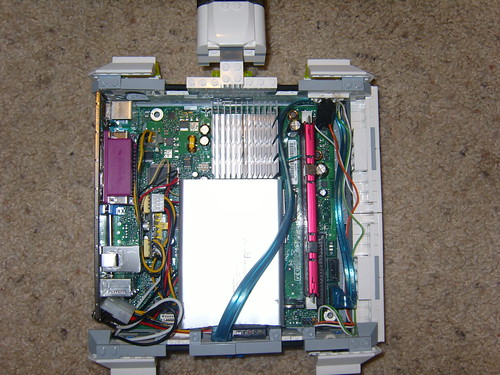
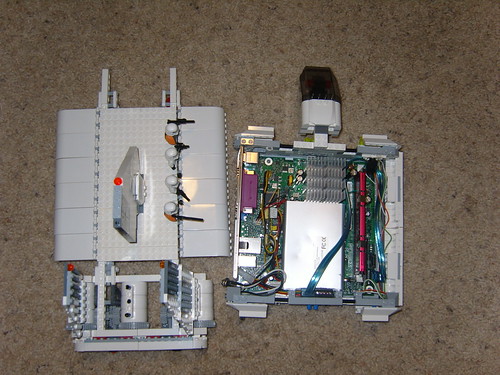
On the motherboard front, things were pretty cramped with a 24x24 lego bip base. What worse was the height restriction. The tallest available is the middle between the two "spines". This portion turned out to be exactly the height of the CPU heatsink (45mm). If the CPU was moved to the left or to the right just slightly, it would not have fit. Squeezing in a 2.5 inch drive was another challenge. Considering the height restriction, the only place it could go was directly over the Northbridge. First, I built a Lego bracket for it to fit into. I wasn't really happy with that solution because I had trouble getting it secure. So I bought a cheap external aluminum enclosure. The outside of it is coated in something that seems non-conductive, so I didn't worry so much if it moved about a little. It was a centimeter or so too long so I cut it down some. The drive also wouldn't fit (too long) if I used a standard SATA cable, so I used a right angle cable to get it to fit.
Fan Installation
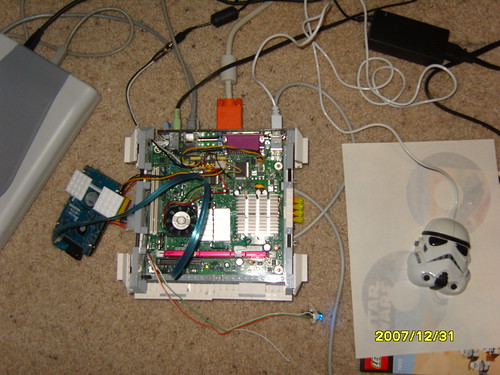
Now I knew I really needed a fan with the hard drive sitting atop the very hot Northbridge. The only spot I could find was to mount it horizontally next to the Northbridge (on top of the video chip, I believe), blowing upwards. This would make it blow up on the hard drive, and force the air over the Northbridge and with some luck the air would make it to the cpu to cool it as well. Fortunately, this is exactly what happened, and the idle CPU temperature went from 70 to 49 degrees Celsius, and the Northbridge was cool to the touch.
Final Tasks
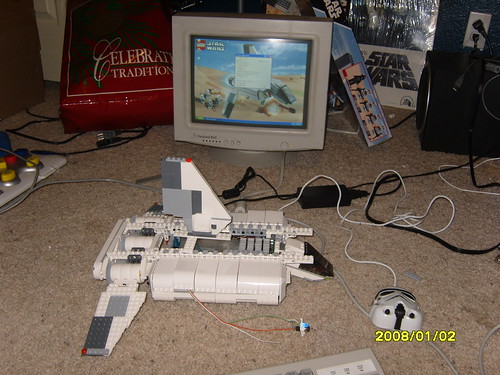
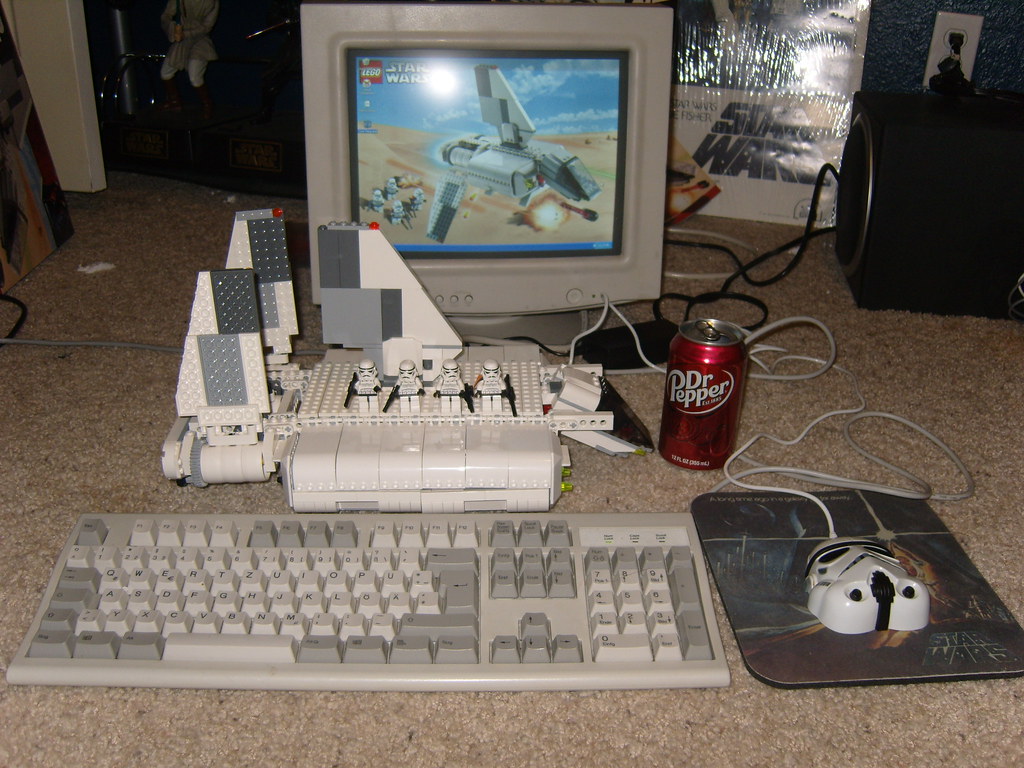
I temporary hooked up a CD-Rom and installed windows, downloaded the Lego 7659 Wallpaper and had the system up and running. The last bits I had were a power button and LED. I happened to have a couple buttons and blue LEDs laying about, so I drilled some holes in a Lego and mounted them in there. Next I glued the Lego into where one of the guns would have gone. Finally, I found a Storm Trooper mouse someone had given me a few years ago which helps complete the look.
What's Next? (Maybe)
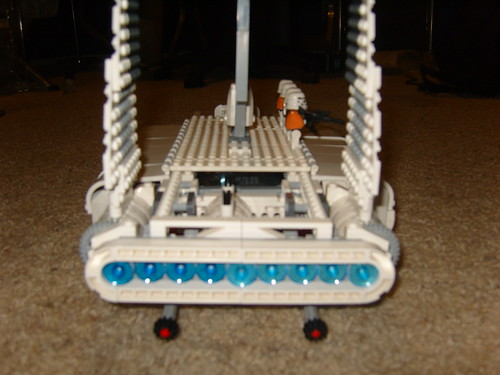
"Everyone" tells me the engine should have blue LEDs. I agree, but I haven.t come up with a good way to implement it and hide the wires and resistors. The engine turrets spin to make the wings go up and down, and since I can't put wires exactly in the middle I would either have to fix the wings in place or make it so that there is enough slack to turn them.
Bill of parts:
2 Star Wars Lego 7659 Imperial Landing Craft Sets
1 Intel D201GLY2 Mini-ITX Motherboard
1 PicoPSU-90 and power brick
1 GB RAM (DDR2 533)
1 60 GB Fujitsu 2.5" SATA Hard Drive
1 40mm DC Fan
1 Right-Angle SATA cable
1 Aluminum USB External hard drive case
1 Momentary Contact button
1 Blue LED
11 additional 12x2 White Legos
I also bought the Comfy Easy PC baby game with USB attachment. William enjoys that quite a bit.
I bought the actual Lego Star Wars II PC game the other day, but it won't run with the built in video on the motherboard. So, I upgraded the motherboard to the new Intel D945GCLF2 Mini ITX board, which supports DirectX 9. I mean, come on, I *have* to have the SW Lego PC game running on it too... While I was upgrading, I ran some benchmarks to compare the two motherboards - click here to see the results.